What is Dark Mode?
Dark Mode is a feature on macOS that inverts the colours of the user interface. This means that the background becomes dark and the text becomes light. Dark Mode can be helpful for people who find bright screens to be fatiguing, especially at night. It can also be helpful for people who have difficulty seeing in bright light.

Introduction:
Dark mode has become increasingly popular among users as it offers a visually appealing and comfortable experience, especially during low-light conditions. Mac users can also enjoy the benefits of dark mode, which not only enhances the aesthetics but also reduces eye strain. In this article, we will provide a detailed guide on how to enable dark mode on your Mac, allowing you to customize your device’s appearance to suit your preferences.
Step 1: Update your Mac’s operating system
Before proceeding with enabling dark mode, ensure that your Mac is running on the latest version of macOS. Apple frequently releases updates that may include new features and improvements, including enhancements to dark mode. To check for updates, follow these steps:
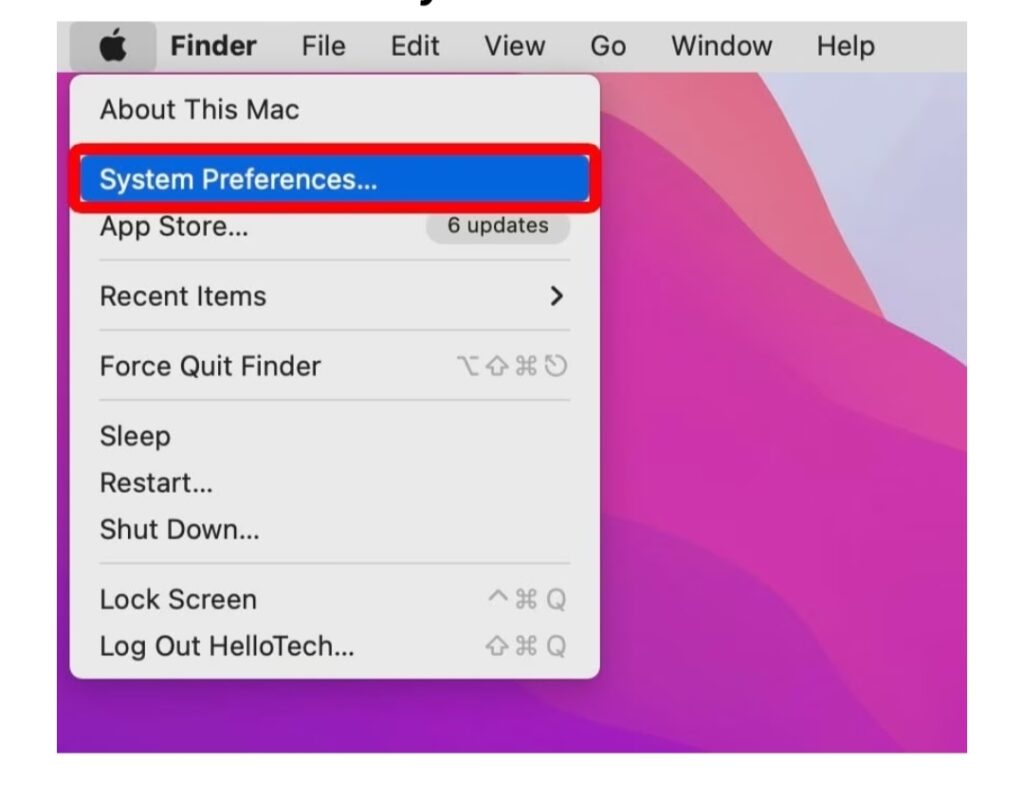
Click on the Apple menu in the top-left corner of your screen.
Select “System Preferences” from the drop-down menu.
In the System Preferences window, click on “Software Update.” If an update is available, click on “Update Now” to install it.

Step 2: Access System Preferences
Once your Mac is up to date, you can proceed to enable dark mode. To access the necessary settings, follow these steps:
Click on the Apple menu in the top-left corner of your screen.
Select “System Preferences” from the drop-down menu.
Step 3: Enable Dark Mode
In the System Preferences window, you will find various options to customize your Mac. To enable dark mode, follow these steps:
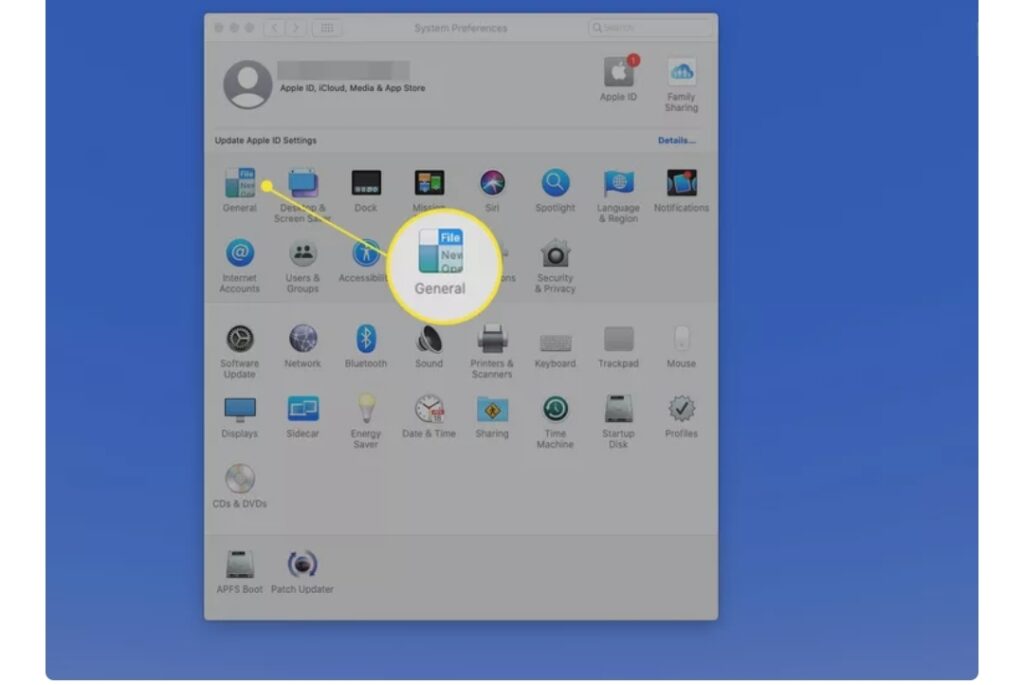
Click on “General.” In the Appearance section, you will see two options:

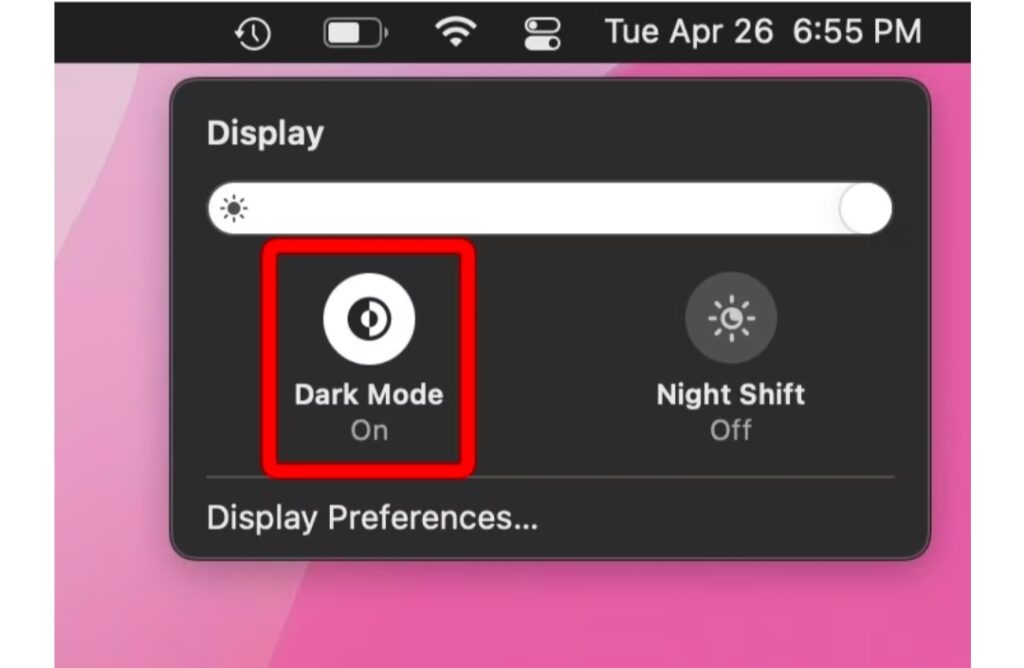
“Light” and “Dark.” Click on “Dark” to enable dark mode instantly.
Alternatively, you can set your Mac to switch between light and dark mode automatically based on the time of day.
To do this, follow these steps:
Click on “General.”
Check the box next to “Auto” under the Appearance section.
Your Mac will now switch to dark mode during the evening and revert to light mode during the day.
Step 4: Customize Dark Mode
Mac allows you to further customize the appearance of dark mode to suit your preferences. To access these options, follow these steps:
Click on the Apple menu in the top-left corner of your screen.
Select “System Preferences” from the drop-down menu.
Click on “General.” In the Appearance section, click on “Customize.” Here, you can adjust the following settings:
Highlight colour: Select a colour that will be used to highlight selected text and items.
Sidebar icon size: Adjust the size of icons in the Finder sidebar.
Scroll bar: Choose between “Automatic,” “When Scrolling,” or “Always” to determine the visibility of scroll bars.
Step 5: Enable Dark Mode
in Individual Apps While enabling dark mode in the system preferences will apply the dark theme to most native apps, some third-party apps may not automatically switch to dark mode. However, many popular apps now offer dark mode options.
To enable dark mode in individual apps, follow these steps:

Open the app you want to enable dark mode for. Look for the app’s preferences or settings menu. Search for an option related to appearance or theme. If available, select the dark mode or night mode option.
Certainly! Here are a few additional tips and tricks to enhance your dark mode experience on Mac:
Keyboard Shortcuts: Toggle Dark Mode: Press “Command + Option + Control + T” to quickly switch between light and dark mode. Spotlight Search in Dark Mode: Press “Command + Space” to open Spotlight search, which will now appear in dark mode.
Dark Mode for Web Browsing: Many popular web browsers, such as Safari, Google Chrome, and Mozilla Firefox, offer dark mode extensions or themes. Install these extensions to enable dark mode while browsing the web.
Some websites also have built-in dark mode options. Look for a moon or sun icon on the website’s interface to switch between light and dark mode.
Dark Mode for Documents: Applications like Pages, Numbers, and Keynote offer dark mode options for creating and editing documents. Look for the appearance or theme settings within these apps to enable dark mode.
Dark Mode for Email: Email clients like Apple Mail and Microsoft Outlook offer dark mode options. Enable dark mode within the settings of your email client to reduce eye strain while reading and composing emails.
Dark Mode for Third-Party Apps: Keep an eye out for updates from your favourite third-party apps, as many developers are adding dark mode support to their applications.
Check the app’s preferences or settings menu for dark mode options. Schedule Dark Mode: If you prefer to have dark mode enabled automatically during specific times, you can schedule it. Go to “System Preferences > General” and click on “Auto” under the Appearance section. Then, click on “Customize” and set the desired time range for dark mode.
Accessibility Options: Mac offers various accessibility options to enhance the dark mode experience. Go to “System Preferences > Accessibility” and explore options like increasing contrast, reducing transparency, and adjusting display settings to optimize dark mode for your needs. Remember, dark mode not only enhances the visual appeal of your Mac but also reduces eye strain, especially in low-light conditions. Experiment with different settings and customize dark mode to your liking. Enjoy the sleek and modern look of your Mac in dark mode!
Conclusion:
Enabling dark mode on your Mac can significantly enhance your user experience, reduce eye strain, and provide a visually appealing interface. By following the step-by-step guide outlined in this article, you can easily enable dark mode on your Mac and customize it to suit your preferences. Enjoy the benefits of dark mode and give your Mac a sleek and modern look.
